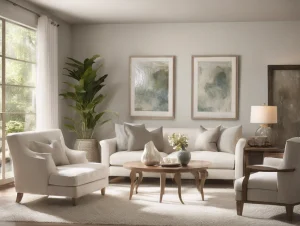
Are you tired of staring at those blank walls in your home and yearning for a splash of creativity to liven them up? You’re in the right place! As a DIY enthusiast and home improvement expert, I’m here to guide you through some of the best DIY wall decor projects that will not only enhance the aesthetic appeal of your space but also give you a sense of accomplishment. This article will walk you through various projects, each broken down into simple, easy-to-follow steps.
Gallery Wall
A gallery wall is a fantastic way to display your favorite photos, artwork, and even quirky trinkets. It’s a versatile project that can be customized to fit any room and style.
Materials Needed:
- Picture frames (various sizes)
- Artwork/Photos
- Hammer and nails or adhesive picture hangers
- Level
- Measuring tape
Steps to Create a Gallery Wall:
- Choose Your Wall: Select a wall that you want to transform. A large, blank wall in the living room or hallway works well.
- Gather Your Items: Collect all the frames and artwork you want to display. Lay them out on the floor to visualize your arrangement.
- Measure and Plan: Use measuring tape to determine the spacing between each frame. It’s helpful to create a template using paper cutouts of your frames and tape them to the wall first.
- Hang Frames: Start with the center frame and work your way outwards. Use a level to ensure each frame is straight.
- Adjust and Enjoy: Step back and adjust as needed. Once satisfied, enjoy your personalized gallery wall!
Floating Shelves
Floating shelves are not only functional but also add a modern touch to your decor. They can be used to display books, plants, or decorative items.
Materials Needed:
- Wooden planks
- Brackets
- Screws
- Drill
- Level
- Sandpaper
- Stain or paint (optional)
Steps to Install Floating Shelves:
- Choose Your Shelves: Decide on the size and number of shelves you need.
- Prepare the Wood: Sand the wooden planks to smooth out any rough edges. If desired, stain or paint the wood to match your decor.
- Mark the Wall: Use a level and measuring tape to mark where each shelf will go. Ensure even spacing.
- Install Brackets: Drill holes and attach the brackets to the wall. Make sure they are secure.
- Mount the Shelves: Place the wooden planks on the brackets and secure them with screws.
- Decorate: Arrange your items on the shelves and enjoy your new, stylish storage solution.
Fabric Wall Art
If you’re looking for a soft and unique touch, fabric wall art might be the perfect project for you. It’s an easy way to add color and texture to a room.
Materials Needed:
- Fabric (your choice of pattern and color)
- Canvas frames
- Staple gun
- Scissors
Steps to Create Fabric Wall Art:
- Choose Your Fabric and Canvas: Select fabric that complements your room’s color scheme and canvas frames that fit your wall space.
- Cut the Fabric: Lay the fabric flat and place the canvas face down on it. Cut the fabric, leaving a few inches of excess on all sides.
- Staple the Fabric: Starting from the center of one side, staple the fabric to the back of the canvas frame. Pull tight and work your way outwards, repeating on all sides.
- Trim Excess Fabric: Once the fabric is secure, trim any excess from the back.
- Hang Your Art: Use picture hangers or adhesive strips to hang your new fabric artwork.
Wall Stenciling
Wall stenciling is a cost-effective way to add intricate designs to your walls without the need for wallpaper. It’s perfect for accent walls and can be customized to fit any style.
Materials Needed:
- Stencil
- Painter’s tape
- Paint
- Roller or stencil brush
- Level
Steps to Stencil a Wall:
- Choose Your Stencil and Paint: Select a stencil pattern and paint color that complements your room.
- Prepare the Wall: Clean the wall and ensure it’s smooth and dry.
- Position the Stencil: Use painter’s tape to secure the stencil to the wall. Use a level to ensure it’s straight.
- Apply the Paint: Gently apply paint using a roller or stencil brush. Be careful not to use too much paint to avoid bleeding.
- Move the Stencil: Carefully remove the stencil and reposition for the next section. Repeat until the design is complete.
- Touch Up: Once the paint is dry, touch up any imperfections with a small brush.
DIY Chalkboard Wall
A chalkboard wall is both fun and functional. It’s a great addition to kitchens, playrooms, or home offices, allowing you to jot down notes, recipes, or let the kids get creative.
Materials Needed:
- Chalkboard paint
- Painter’s tape
- Roller or brush
- Chalk
Steps to Create a Chalkboard Wall:
- Choose Your Wall: Select a wall or section of a wall for your chalkboard. Clean and dry the surface.
- Tape the Edges: Use painter’s tape to outline the area you want to paint.
- Apply Chalkboard Paint: Stir the paint well and apply with a roller or brush. Allow to dry and apply a second coat if needed.
- Cure the Paint: Once dry, condition the chalkboard by rubbing the side of a piece of chalk over the entire surface and wiping it off.
- Get Creative: Start writing and drawing on your new chalkboard wall!
Macrame Wall Hanging
Macrame wall hangings add a boho-chic vibe to any room. While they may look intricate, they are relatively easy to make with a bit of patience and practice.
Materials Needed:
- Macrame cord
- Wooden dowel or branch
- Scissors
- Tape measure
Steps to Create a Macrame Wall Hanging:
- Cut the Cord: Decide on the length of your wall hanging and cut multiple pieces of cord to double that length.
- Attach to Dowel: Fold each piece of cord in half and attach to the dowel using a lark’s head knot.
- Create Patterns: Use various macrame knots (square knots, half hitch, etc.) to create your desired pattern. There are plenty of tutorials available online for different knots.
- Trim and Finish: Once your pattern is complete, trim the ends of the cords to your desired length.
- Hang It Up: Use a nail or hook to hang your macrame masterpiece on the wall.
Conclusion
Transforming your home with DIY wall decor projects is not only rewarding but also allows you to express your creativity and personal style. Whether you’re a seasoned DIYer or new to the world of home improvement, these projects are designed to be simple and enjoyable. From gallery walls to macrame hangings, there’s something for everyone. So, roll up your sleeves, gather your materials, and start beautifying those blank walls today!
Remember, the most important part of any DIY project is to have fun and enjoy the process. Happy decorating!


